
The Perfect Sourdough Recipe: Tested & Tasted

If there’s one thing that brings comfort during the fall and winter months, it’s the smell of freshly baked sourdough coming out of the oven. I’ve baked plenty of loaves, but this time, I wanted to dial it in and learn why the best sourdough recipes work, not just follow the steps blindly. So I did what most of us do when we get serious about a recipe: I asked a lot of questions.
Tools to consider
Step One: The Start of the Dough
My journey began around 5:10 p.m. — the flour, water, and rest stage (called the autolyse). This is where the magic quietly starts. The flour hydrates, gluten begins to form naturally, and the dough starts to take on that silky texture bakers love.
After about half an hour, I added my active starter and salt — and that’s where the questions started rolling in.
“Why do some recipes let the dough sit out overnight while others call for refrigeration?”
It turns out that temperature is the secret ingredient most recipes overlook. Leaving dough out overnight works great if your kitchen is cool (around 65°F), but in most homes, that can lead to over-proofing. The cold proof method, where you refrigerate the dough overnight, gives more control, a better crust, and deeper flavor.
Step Two: Stretch, Fold, and Wait
For the next few hours, I performed gentle stretch-and-folds, a soothing rhythm every 30 minutes during bulk fermentation. By the end of four hours, the dough was smooth, slightly domed, and full of life.
Step Three: The Dutch Oven Magic
The next morning, I faced another classic sourdough question:
“Do I really need to preheat the pot?”
Yes. Always. The Dutch oven needs at least 45 minutes at 475°F to become a mini bread oven. That blazing heat and enclosed steam are what create the gorgeous crust and oven spring that sourdough dreams are made of.
When the dough hit the hot pot, the smell of fermentation and toasted wheat filled the kitchen. I baked it covered for 20 minutes, then uncovered it for the last phase.
Step Four: Browning, Butter, and That Final Question
Mid-bake, I noticed the crust browning quickly and wondered:
“Can I take it out early if I want a softer crust?”
Yes, you can, and you should if that’s your style. For a soft, tender crust, shorten the uncovered time to about 15–18 minutes and lower the oven to 440–445°F.
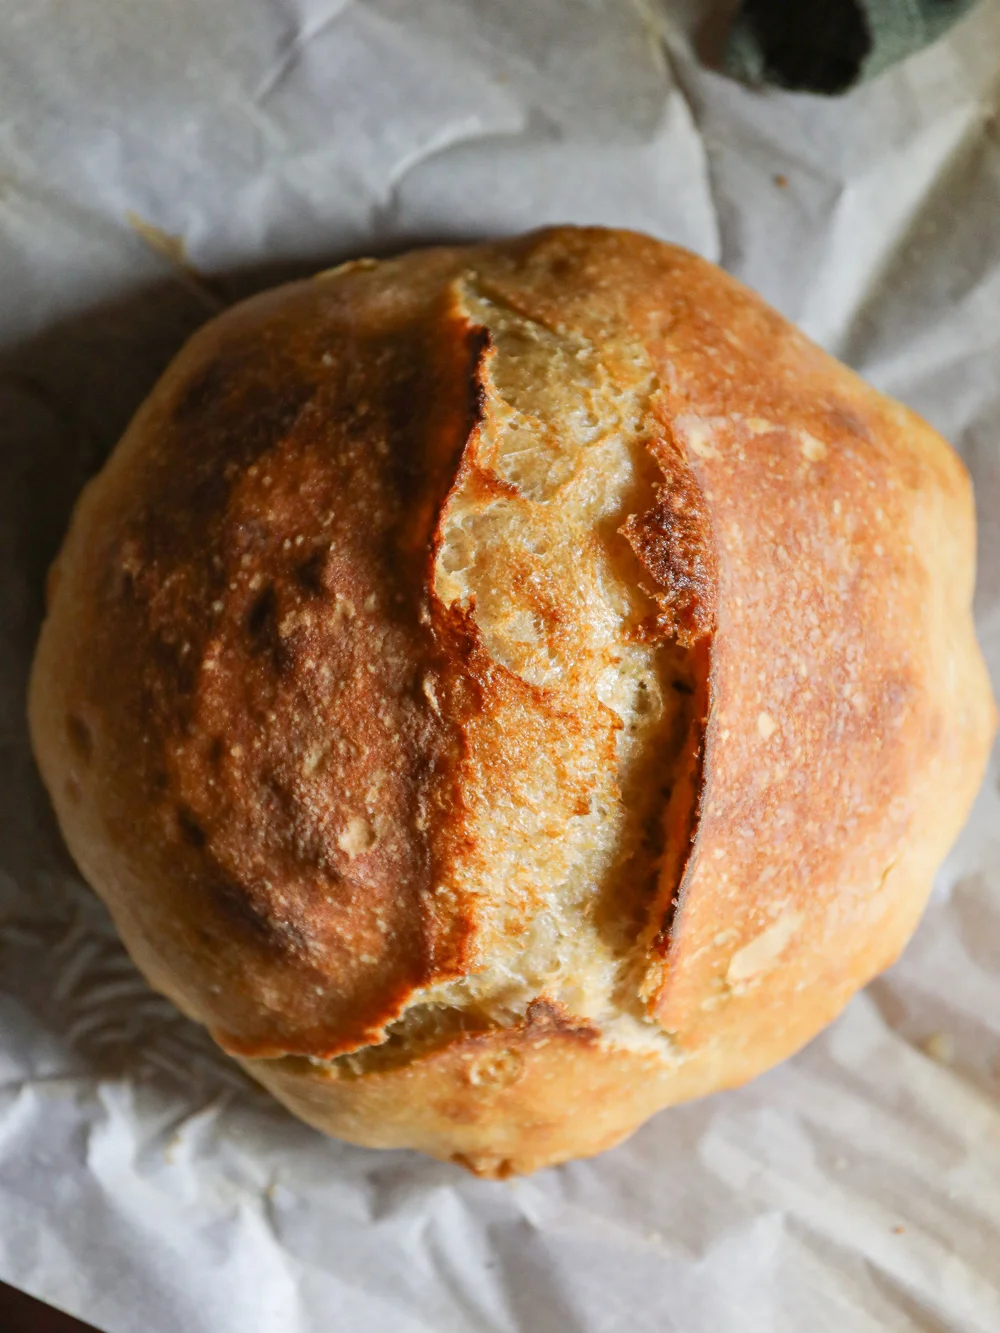
Once I pulled it from the oven, I brushed it immediately with melted butter, a pinch of salt, and covered it with a clean towel as it cooled. The result? A loaf that was soft, golden, and still had a delicate crackle when sliced.
Step Five: The Reward
After an hour of cooling (the hardest part), I sliced into a loaf that was airy, chewy, and perfectly tangy, everything a home baker could hope for. The crust was soft enough for sandwiches but still sturdy enough for soups or stews.
And that’s what I love about sourdough: it’s not just about the recipe, it’s about the learning, the small tweaks, and yes, the questions you ask along the way.
Tips Recap:
Autolyse: 30–60 minutes of rest before adding starter.
Bulk Fermentation: 4–5 hours with stretch-and-folds every 30 minutes.
Cold Proof: Refrigerate 12–18 hours for flavor and structure.
Dutch Oven: Preheat 45 minutes at 475°F for perfect oven spring.
Softer Crust: Lower temp to 440°F and shorten uncovered bake time.
Finish: Brush with butter immediately after baking and cover with a towel while cooling.
Final Thought
Sourdough isn’t about perfection — it’s about progress. Each loaf teaches you something new about patience, timing, and trust. The next time you bake, don’t be afraid to ask questions mid-process. That curiosity is what turns a simple loaf into a personal masterpiece.
Perfect Dutch Oven Sourdough
Ingredients
- 450 g bread flour
- 50 g whole wheat flour
- 350 g water (≈75°F)
- 100 g active sourdough starter (100% hydration)
- 10 g fine sea salt
- Rice or AP flour for dusting
- 1 Tbsp melted unsalted butter (optional)
Equipment
- 5–7 qt Dutch oven with lid
- Banneton or towel-lined bowl
- Kitchen scale, scraper, razor/lame
- Parchment paper
- Wire rack

Method
- Step 1: Autolyse (30–60 min)
Mix both flours (450 g bread flour, 50 g whole wheat) and water (350 g) until no dry spots remain. Cover and rest 30–60 min to hydrate the dough. - Step 2: Mix
Add active starter (100 g) and salt (10 g). Mix until the dough forms a cohesive, slightly sticky mass. - Step 3: Bulk Fermentation (4–5 h @ 75–78 °F)
Perform 3–4 sets of stretch-and-folds every 30 min during the first 2 h. Rest until dough is smooth, puffy, and about 30–50 % larger. - Step 4: Preshape & Bench Rest (20 min)
Turn the dough onto a lightly floured surface, gently round it, and let rest uncovered for 20 min. - Step 5: Final Shape & Cold Proof (12–18 h)
Shape into a tight boule or batard. Place seam-side up in a floured banneton, cover, and refrigerate overnight (up to 18 h). - Step 6: Preheat
Place your Dutch oven with lid inside and preheat to 475 °F for 45 min before baking. - Step 7: Bake
Transfer dough onto parchment, score the top, and carefully place into the hot Dutch oven. Bake 20 min covered @ 475 °F, then 20–25 min uncovered @ 450 °F until the crust is deep golden. - Step 8: Cool
Remove from the pot and cool on a wire rack for ≥ 1 h before slicing.
Quick Q & A
Flour before unmolding? Yes — lightly dust before flipping onto parchment.
Preheat Dutch oven? Always — 45 min creates instant steam and strong oven spring.
Crust browning too fast? Lower to 440 °F or tent with foil; done when the bottom sounds hollow.
Butter timing? Brush right after removing from the pot, while hot.
Tip: Allow the loaf to cool completely before slicing for the best crumb. Cold proofing ensures consistent results and deep flavor year-round.